
What is Xamarin?
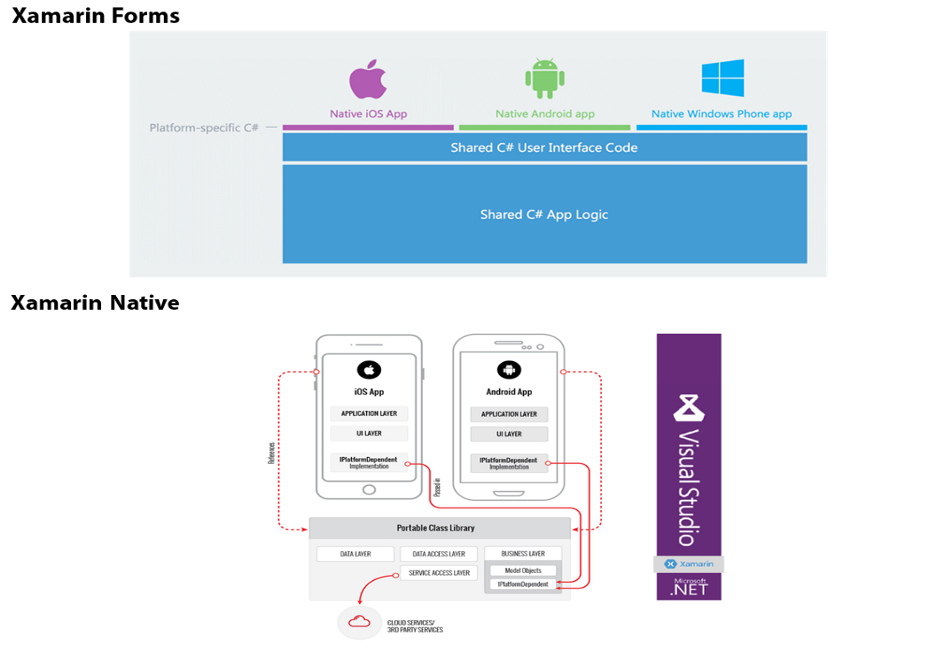
Xamarin is a Microsoft technology based platform.Three types of projects can be created through Xamarin.
1. Xamarin.Forms
2. Xamrin.iOS
3. Xamrin.Android
A simple illustration diagram is shown below.
System Requirements for Xamarin Developments
If you are familiar with Visual Studio 2017(Windows) or Visual Studio for Mac (Mac OS) and you are almost ready for the Xamarin App developments this article will describe the additional requirements.
Create your first Xamarin.Forms App
For Mac Users, you can follow the exact steps below. Windows Users also can do the same, but steps are slightly different.
Open Visual Studio For Mac
1. Click “File” Menu from Top navigation bar
2. Click on “New Solution”
3. In the Left pane click on “App” under “Multiplatform” menu. You will end up with “Choose a template for your new project” window
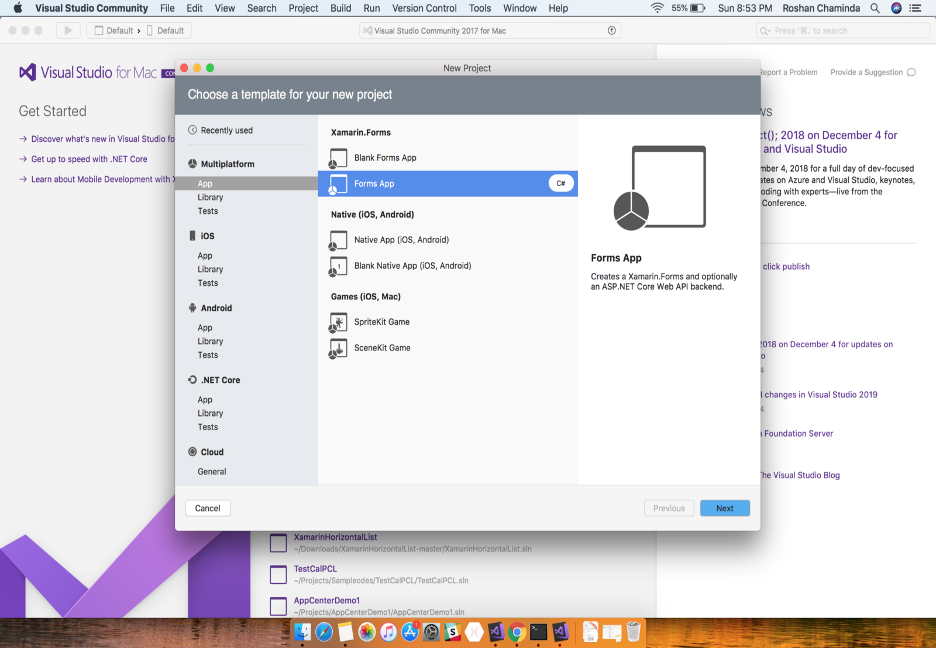
4. Select “Forms App” under “Xamarin.Forms” category and click “Next”
5. Then navigate to “Configure your Forms App” window
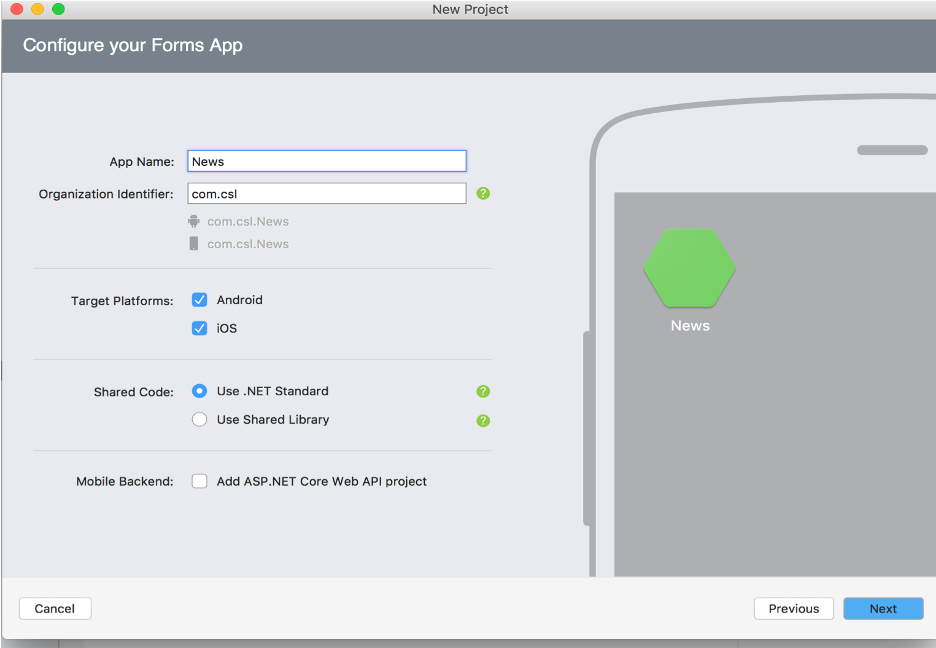
6. Enter name for your App (News) and organization identifier (unique value). Under “Shared Code” section check “use .NET Standard” radio button. Then click “Next”
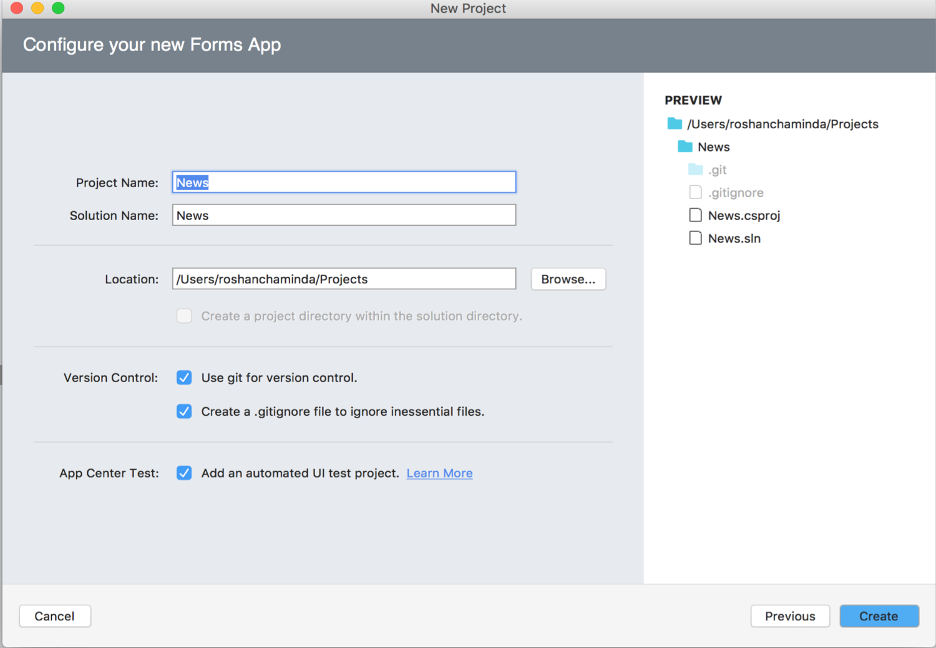
7. The Preview Screen will popup and Add Location for Save your project. If you are willing to use it, check “Use git for version control” or other wise uncheck it. Then Click on “Create”
8. Now your first Xamarin.Forms project is ready for coding. Your project structure should be as follows. Four projects will be created including UITest layer.
Note: MVVM based architecture will be created using the above procedure. Few files will be auto generated and will keep those as it is for now.
What We Are Going To Do Now:
In this tutorial (Part 1) we are going to create a simple “User Login” Form with validations through basic Xamarin.Forms concepts.
Below Xamarin.Forms concepts will be used in Part 1
1. Create a simple UI using StackLayout
2. Use Behaviours
3. Use Bindable Properties
4. Use content page resources
5. Use value converters(Object Converters)
OK, Lets Start
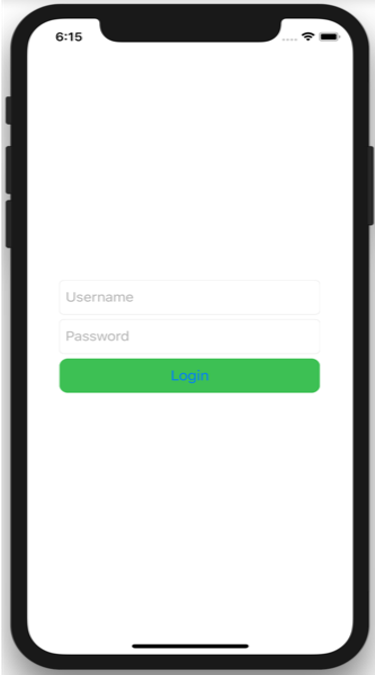
If you are familiar with above concepts and haven’t more time to go through a detailed explanation, this is the final output.
Otherwise go through the below, step by step.
First add a “LoginPage” for our app
1. Right click on “Views” folder under “News” project and click on “Add > New File…”
2. “New File” window will open and click on “Forms Content View XAML” file
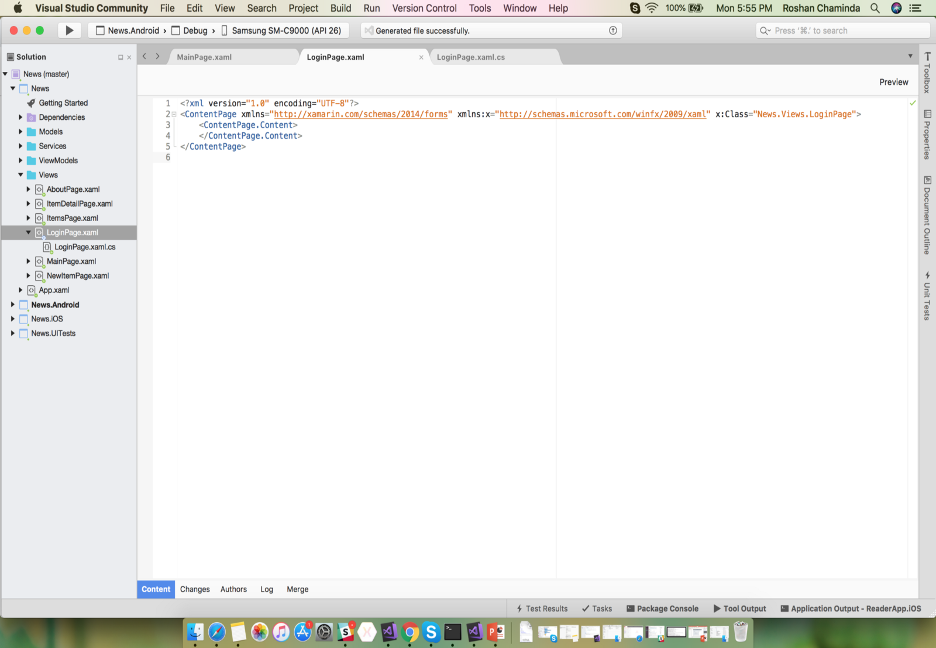
3. Name it as “LoginPage” and click on “New” button. It will create a empty XAML page under “Views” folder like below
When we design a page from Xamarin.Forms we have to create a layout (in Native developments this is called "View"). Simply start using “StackLayout”
Then we need a way to enter username, password and submit Button. In Xamarin.Forms for entering text values we can use “ Entry” and for Submit values we can use “Button”.
“UserName” entry will look like below. Several predefined properties are there such as “Widthrequest” ,“HeightRequest”,etc. For special purposes we can create our own “Bindable Properties” which will be discussed in a later part of this article.
<script src="https://gist.github.com/roshanchaminda/f7c13a8021df0285afddb39b840317b1.js"></script>
Replace “LoginPage.xaml” code with below.
<script src="https://gist.github.com/roshanchaminda/f843367b2bf64fe68d5e9254b5596652.js"></script>
Then open “App.xaml.cs” file under “News” project. And Set Main page as LoginPage like below.
MainPage = new LoginPage();
Now RightClick on “News.iOS” project in Solution pane and click “Set As Startup Project”. Then Run your App on Simulator(Run > Start Debugging on top menu).
Note: For Windows users you can set “News.Android” project as Startup project if you haven’t Mac on your network.
Basic view is ready, now we need to implement simple validation for this form. For that kind of functionality implementations we can use “Behaviors”
Right Click on “News” project and Add a folder called, “Behaviors”. Then click on that folder and create an empty class as “ EmailValidator”. To use this class through common reference we'll change the namespace of “EmailValidator” class from “ News.Behaviors” to “ News”. Replace your EmailValidator class code using below code.
As a summery we have done below implementations inside:
1. According to Behavior introduction, “OnAttachedTo” and “OnDetachingFrom” methods implemented (override) for text changed event
2. “IsValid” Bindable Property has declared. This will return us whether entered value is valid
3. Regular Expressions has used for validate input value
4. Inside TextChanged event, text color will be set based on “IsValid” property
<script src="https://gist.github.com/roshanchaminda/0c9046712f3c44f3aede395413d50299.js"></script>
Add these two reference top of the page
using System.Text.RegularExpressions;
using Xamarin.Forms;
Use same procedure and add “ PasswordValidator” class file inside “Behaviors” folder sand replace using below code.
<script src="https://gist.github.com/roshanchaminda/2e0f296720ccf88dfb4bc72861fdfa33.js"></script>
Now we can use above Behaviors to validate our LoginPage inputs.
For access C# class from XAML file, we have to declare an XAML namespace with a prefix. Add below reference to “ContentPage” like adding a property.
xmlns:local=”clr-namespace:News;assembly=News”
Then add Behavior for “UserName” entry as follows:
<script src="https://gist.github.com/roshanchaminda/1fd3c644dadc9cb9bcae01448590ca51.js"></script>
Add Behavior for “Password” Entry using same way.
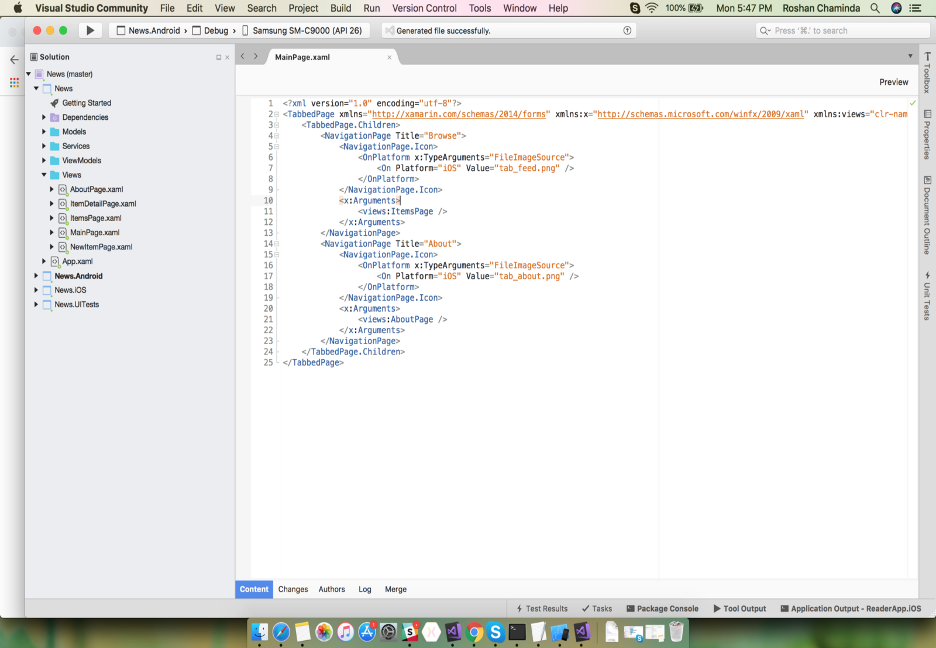
Once you are done, LoginPage.xaml looks like below:
Now compile and run your code through simulator. Enter some value for UserName text box, that should be displayed in RED. If you add correct email, text should be converted to BLACK.
Now will try to add “correct” and “wrong” indicators (images) in front of text box based on validation result. For that we can use “Value Converters”.
For Xamarin.Forms we have “Image” control for display images. Display image using “Image” control, need an image file name (string) based on return boolean value from behavior.
Right Click on “News” project and add a folder called “Converters”. And then add a class file called “BooleanToStringConverter”. Change namespace from “ News.Converters” to "News”. Replace existing code with below one.
<script src="https://gist.github.com/roshanchaminda/42e332c927ef9dd28a2e6db6adf9630c.js"></script>
Then create “success.png” and “error.png” images and place inside Resources folder in “News.iOS” project. For “News.Android” project, open “Resources” folder and then open “drawable” or “mipmap-hdpi” folder and place two images.
To use converters, we have to use “ResourceDictionary” which is used for sharing resources in application. Add below code to just above the “ContentPage.Content” start tag.
<script src="https://gist.github.com/roshanchaminda/ee26b3c793a5e6ac5a6479da77cb21ee.js"></script>
Then we have to add our “success” and “error” images. Add an image tag just below the “UserName” entry as below.
<script src="https://gist.github.com/roshanchaminda/0f050f2d5992bcdf6b0124fc618e602e.js"></script>
In above code, we have set image “Source” property through “Behavior” reference.
If you want more details regarding this image “Source”,
Source = {x:Reference EmailValidator}?—?“EmailValidator” Behavior class as image source.
Path=IsValid?—?Bindable Property in “EmailValidator” Behavior class. This value will be used for Converter.
Converter={StaticResource BooleanToStringConverter}?—?Converter which is used for check property in “Path”.
Once you are done, Your complete “LoginPage.xaml” code should look like below.
<script src="https://gist.github.com/roshanchaminda/33b64de87087cc332d1aff1b46a42efc.js"></script>
Now you are ready to check what you have done so far.
Compile your project and Run. You end result should be as follows. Same result should be displayed in Android app as well.

In next article (Part 2) we will discuss,
1. Complete UI using “ScrollView” And “AbsoluteLayout”
2. Add Login Functionality through API Request
3. Use local database for store values
4. Use vertical ListView to display Items
.png)