Using logs for applications is a good way to identify errors, threats, profiling and many more critical facts. That is why developers prefer Fluent Bit. If we can analyse,query and visualise data in a meaningful manner, then the results will be more productive. That’s where Splunk comes in. In this post, I concentrate on how to have these two magnificent tools link in order to get the optimum outcome.
First I’ll explain the environment that this setup was tested on.
· Splunk Enterprise:Version 8.0.1
· Fluent Bit:Version 1.6.10
· Fluent Bitrunning OS version: Ubuntu 20.04.1 LTS
Splunk is a software forsearching, monitoring, and analysing machine-generated big data via a Web-styleinterface. First we will take a look at the configuration that has to be done in Splunk. I hope you have a basic understanding of Splunk-related terminologies that are used here.
Let’s start withcreating an Index in Splunk.
· Log in toyour Splunk Enterprise application and click on the Settings menu item in the upper right corner where you can find the Indexesoption.
· Click on theNew Index button at the upper right corner, where you get a popup window like below.
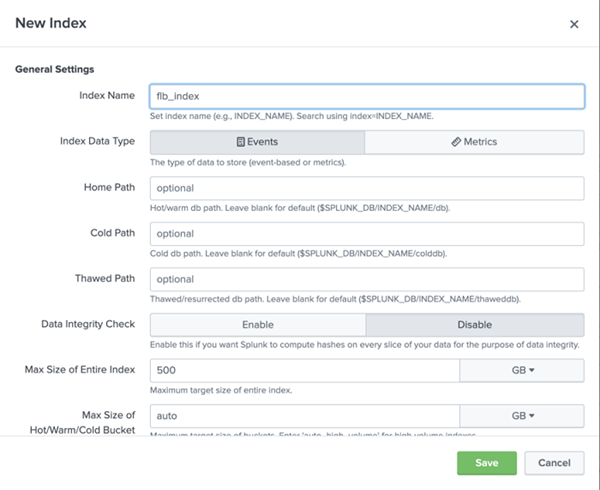
· Provide a name to your Index and keep other fields as it is if your are new to Splunk. Otherwise you can customise those values according to your need but that part is irrelevant to the purpose of this post.
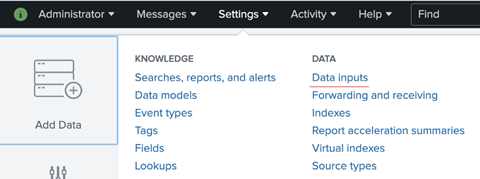
· After saving the above pop up, we need to create an HEC (HTTP Event Collector)token.
· To navigate to that window, click on Settings like earlier and then select Datainputs.
· Click on the New Token button in the upper right hand corner where you will get four steps to fill data.

First - Provide a name
Second: Select the created index
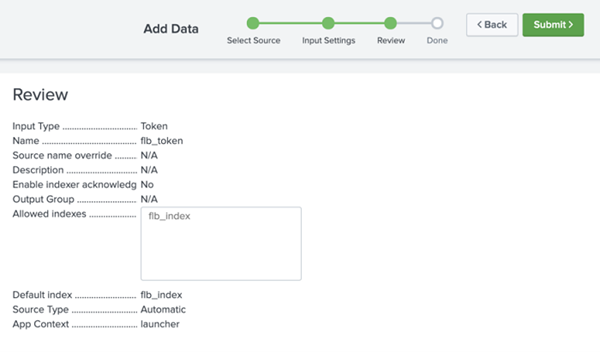
Third: Review settings
Fourth: Complete and copy the token value
Now we are good to go ahead with Fluent Bit related changes. It’s all about the configuration file.
[INPUT]
Name dummy
[FILTER]
Name nest
Match *
Operation nest
Wildcard *
Nest_under event
[FILTER]
Name modify
Match *
Add indexflb_index
[OUTPUT]
Name splunk
Match *
Host <your splunk server ip goes here>
Port 8088
TLS Off
TLS.Verify Off
Splunk_Token<your splunk HEC token goes here>
Splunk_Send_Raw On
I am not going todescribe the configuration parameter included here, because it has been clearly explained in the Fluent Bit documentation.
Once you run the Fluent Bit configuration file, you will be able to query the index from Splunk application.
Results will look something like below.
Done! It is quite straightforward and easy as that. Hope you will also find it easy too!
.png)